Needing a bigger trailer than my
"Little Rose", I decided to sell a few of the beautiful antiques I have gathered over the years and buy this, a classic old, old, old Avion Travel Trailer.
I have been attending more art festivals and sometimes hubby comes along and we just needed more space. He gladly made the 5 hour one way trip to pick up the trailer, and didn't complain when the trailer lights shorted out in the snow storm as we were dragging her home. He didn't seem to mind having to spend the long, cold night stranded along the road waiting for daylight with just a small coat to keep us warm. We patiently waited out the night, but at daybreak the fog rolled in and we still needed the lights. Luckily I am a farm gal and after thinking about it for a while I asked, "Couldn't we somehow hook into the back lights of the vehicle?" It was worth a look and as we tore into the back wall panel, we discovered a wire to a heater fan. Hooked into the wire and simply had to turn on the heater fan for the trailer lights to work. I will say however, he did gave me quite the look when we first stepped inside the trailer and he saw the shape it was in, but he didn't say a word other than, "it's up to you". Being a bit of a dreamer and an artist, I could see what potential it had and was thrilled for all the possibilities. Smiling, I handed over the cash!

This little trailer pulled home like a dream. She didn't slip and slide on the snowy roads, and followed along so nicely it was hard to tell we were even dragging a trailer.
She is 18 feet long, just the right size for us to take on our travels.
We spent a couple of days gutting out the interior.
(Yes, those are holes in the floor)
Then it was off to the store to buy paint, marine plywood to cover the big holes in the floor, and new laminate flooring. The step into the trailer was re-attached and c-bolts were added to the metal frame for more stability. Grates were screwed shut and the holes from small doors that were missing were covered with rolled aluminum sheeting. Once again hubby gave me the look when I said I wanted to buy blue, orange and green paint, but by now he was getting anxious to see the results of all our hard work so he just said "It's up to you".
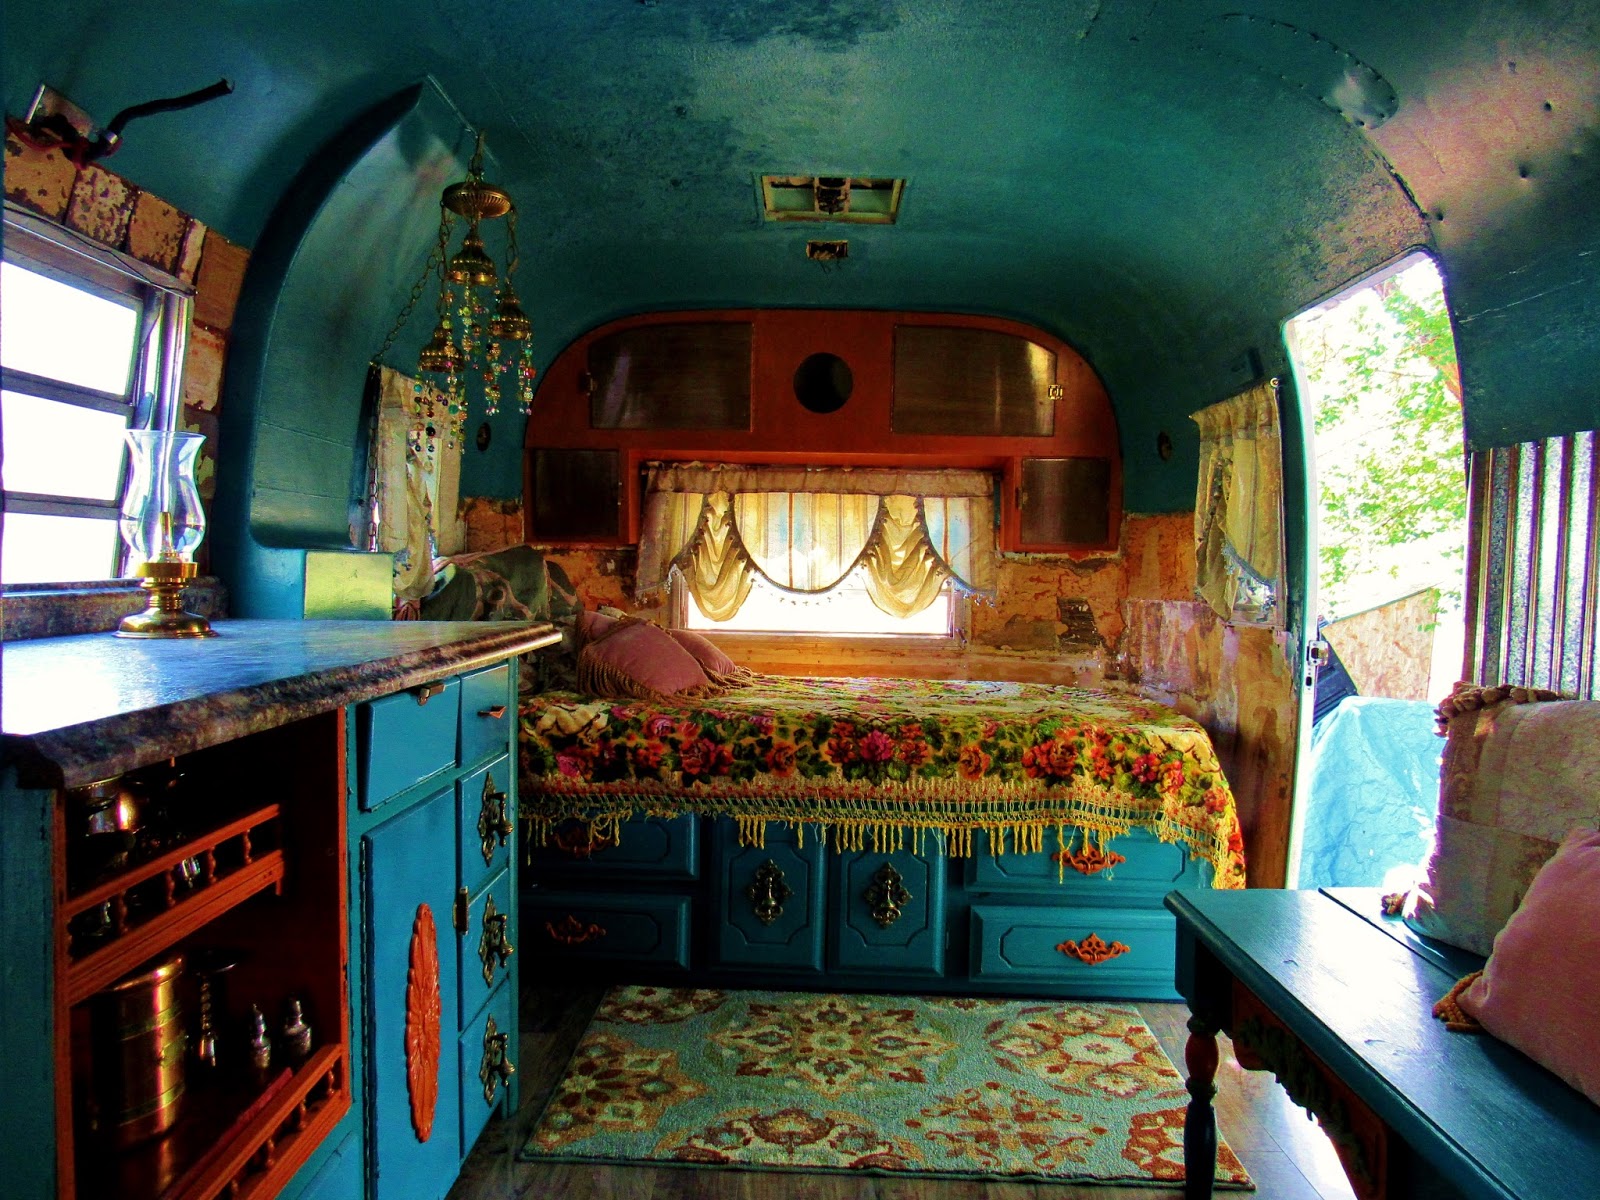
I purchased an old, used, water bed frame with drawers at the Habitat for Humanity store. I knew they would be just the right height to place the mattress on. The water bed headboard was placed in the wood shed to be donated later to a local thrift store.
We yanked out the propane stove and fridge. Keeping the existing cupboards, I painted them and added new (old,vintage) hardware. We built a cupboard to fit in the area where the stove was. It is filled with my silver tea set and copper pots and pans.
Here are the results!!!!
(I know, can you believe it?)
The propane stove and sink were removed to allow for the full counter top. I needed the space to work on various art projects, framing, painting etc. I have an old Coleman Propane stove to cook on outside and a large metal milk bucket I fill with water to heat up and do the dishes in.
The wall surrounding the bed was left "as is". It has so much character from years of use and different layers of paint, wall paper, and old peeling cork.
The large double closet is big enough to hold all our clothes and shoes for an extended stay.
I found the perfect vintage chandelier after several years of searching. It showed up in the local thrift store! The hole that was in the cupboard where an old clock would have been was covered with a second-hand silver plated serving tray and then I attached a mirror over top of the tray. I purchased the bird pillows in a discount store. They are the only "new" items in the trailer, but I couldn't resist the bright colors and colorful tassels.
The double door storage area under the water-bed frame is the perfect place to put both my oil and watercolor easels. There is also plenty of room in the drawers for all my sketch pads and other art supplies, or the drawers can be filled with food, clothes, and necessities.
Corrugated tin placed along a portion of the bottom edge reflects surrounding colors
Candle sticks are screwed down to the top of the shelf. They remain stationary as we travel.
Old metal tiles I had purchased 20 years ago line the wall above the counter. An old paraffin oil lantern I purchased in Wyoming, gives us light.
A chandelier made from a vintage lamp and pretty beads scored in the discount bin at a local craft store makes a beautiful addition.
Remember the old water bed headboard destined for the thrift store? As it was being loaded into the vehicle, I had a flash of inspiration. What if I tore it apart and made it into a bench for the trailer?
It turned out better than expected and can easily be removed if needed.
If desired, I can add my old rocking chair. I recovered it in a mix-matched variety of fabric, velvet, lace and trim. It gives me a perfect, soft comfy
place to sit.
Just found this smaller, green velvet chair at a second hand store. It fits the space better so the rocker was moved into the house. I filled the small cupboard with books to read while on the road.
Photos of the bathroom before the remodel.
 |
| shower and counter with sink |
and after
A portion of the cabinet was removed to allow for more room around the toilet. I used green industrial, waterproof paint to coat the inside of the shower. The walls were painted orange and corrugated metal was placed on the wall surrounding the toilet. Tile was also used along the floor, covering the holding tank and the shower entrance.
We do not have water in the trailer. A personal choice, the trailer is old and the shower and sinks were made to run out on the ground. We will be collecting the shower water in a bin under the trailer to dump in specified areas. To conserve water, we will use a small solar shower bag and a basin for washing our hands. By removing the existing sink, I had a large counter space and wanted to make it extra fancy. I constructed a mosaic top out of old plates gathered from the kitchen.
A blue patterned shower curtain picks up the colors of the flowers on the counter-top.
The tile placed around the holding tank and shower edge is the same tile used around the mosaic counter-top.
I added this vintage metal rose wall hanging along part of the wall and across the top. I wanted something to help transition between the green and orange colors. Bright blue birds are added........well because I wanted to and they match the shower curtain.
Now we are ready to run away on another adventure!
I have traveled extensively the past couple of years since the remodel. Took a trip along the old route 66. I attended several Plein Air art festivals in Southern Utah. Camped in the high Uintas, the Rocky mountains, and made a couple of trips through Arizona to visit my kids. If you see me along the way be sure to honk or come on over to my camp and say "hello".

"
"All who wander are not lost."
J.R.R. Tolkien
click here to see how
I spend my summers in a camp trailer while working
on my beautiful, organic vegetable farm.
click here for gardening information
click here to read a little more about me